
With the ever growing and ever changing demands on hardware we keep seeing vps’s and servers getting bigger and bigger, but this also comes with a price tag.
With this, I am going to focus on the lowend market and targetting small VPS accounts and really see what they can do.
The first victim is ColoCrossing, and the following.

So $10 later, and a new VPS in New York I am off to the races.
The current focus is webhosting, I want to see what Wordperfect can do, see if I can stream some videos, and a download mirror.
First Up, I wanted to see if I can get a “control panel” like product installed. So off to one of my favorite panels ServerAvatar. Now this is not a “typical” panel as the only focus is web/database/sftp that is it, there is no email, no stats, no bandwidth tracking nothing but web.
I asked myself “self why not a full control panel in one place?” My answer is “lets do this on the cheap side of things.” This leaves me with 2 main functions of a website.
- Website
- Database
- sFTP/FTP
- Email
So how do we do this with a 1GB VPS? We we are honestly going to split this into two accounts, which will cost $20/year for all your needs. * Well a solid site, but a under 18GB’s of storage space for your website, and 10GB’s of email storage. We are also going to assume you have DNS setup, such as Cloudflare.
1st lets order our email hosting. – CraneMail is that answer – Readmore Here and order.
Why is this? Well your going to need email for your domain right? If not such as proton mail or gmail, then you can just skip the above.
2nd. A VPS, lets go with the above VPS. Order from here.
Now once you get this setup, lets go ahead and install and setup the system.
Now in this example we will be using Ubuntu 22.x so please when you check out, select Ubuntu 22 as the OS installed, if not no big deal just when you get access to the VPS control panel, reformat it into Ubuntu 22.x
On this setup you dont’ need to do a bunch as it does all the work for you. So lets begin.
First go ahead an log into your new VPS. Then we are going to fun a few commands.
rm -f /etc/sysctl.conf
wget https://theserveradmin.com/sysctl.txt
mv sysctl.txt /etc/sysctl.conf
sysctl -p
The above command is tweaking some of the systems configurations for a better optimized network.
Next lets update this VPS
apt-get update && apt-get upgrade -yI know we don’t need to, but my preference is to reboot after a fully systems update/upgrade.
rebootWhile this is loading up, lets see that panel. Well that panel is called ServerAvatar. They have a free tier for 1 server and like 10 domains for free. Read More – Serveravatar. I have the paid tier but you will see almost the same things.
Now that we are back up and running from that reboot, lets go ahead and install.
wget https://srvr.so/install_lite && chmod +x install_lite && ./install_lite
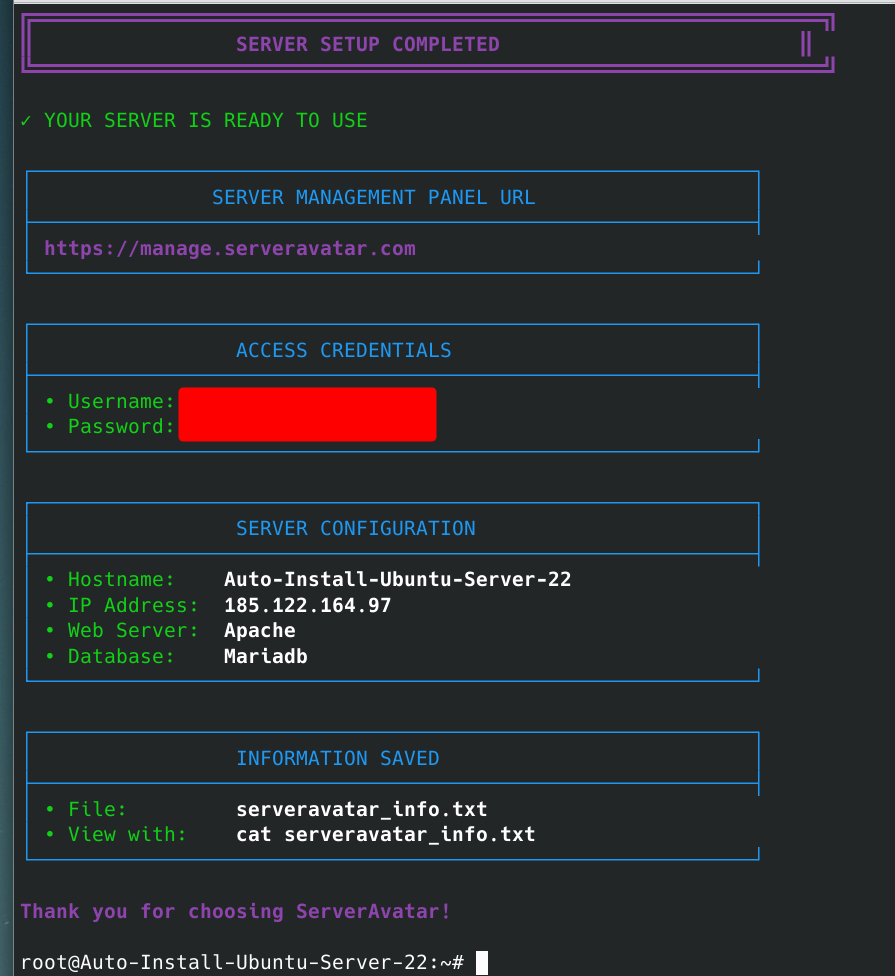
Now just sit back and watch, once this process is don’t you will be presented login credentials. Once the install is finished follow the link with your username and password.
** I have more options as I have the paid panel, but login and lets begin.
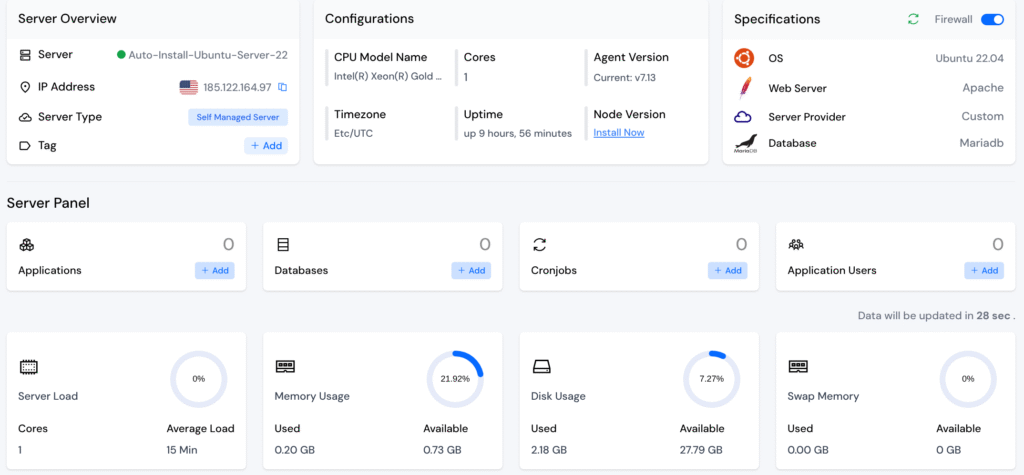
Once logged in you will see something like the following.
Now its time to install our application.
Durning the install you will be asked the following.
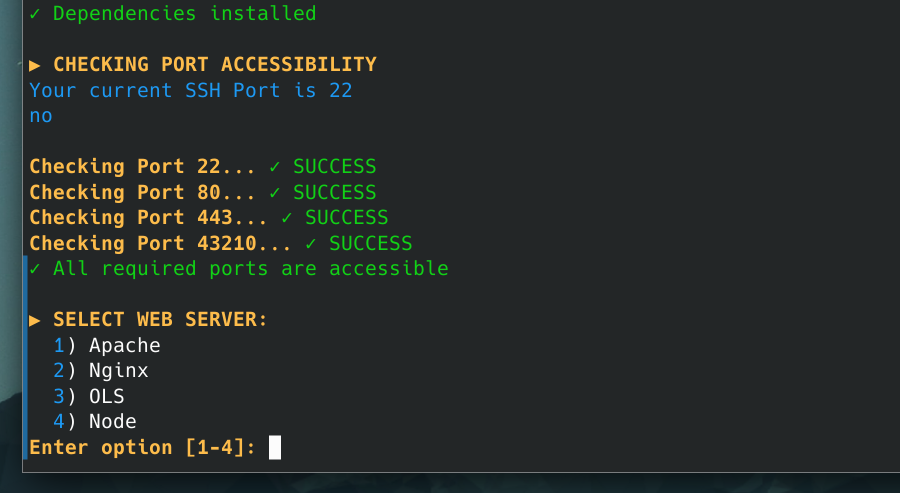
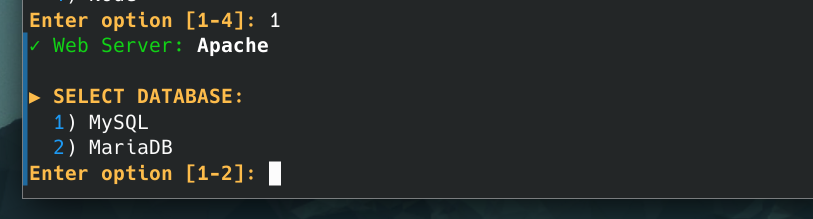
This is completely up to you, in this example I am going to install a LAMP stack, so I am selecting 1.) Apache, then you will be asked for the Database server. I am selecting 2 MariaDB
Now we have to create a username/password for the serveravatar login. After this it will install your setup for you.
Now lets head over to our panel login and see what we can see.
Once logged in, the install will continue.
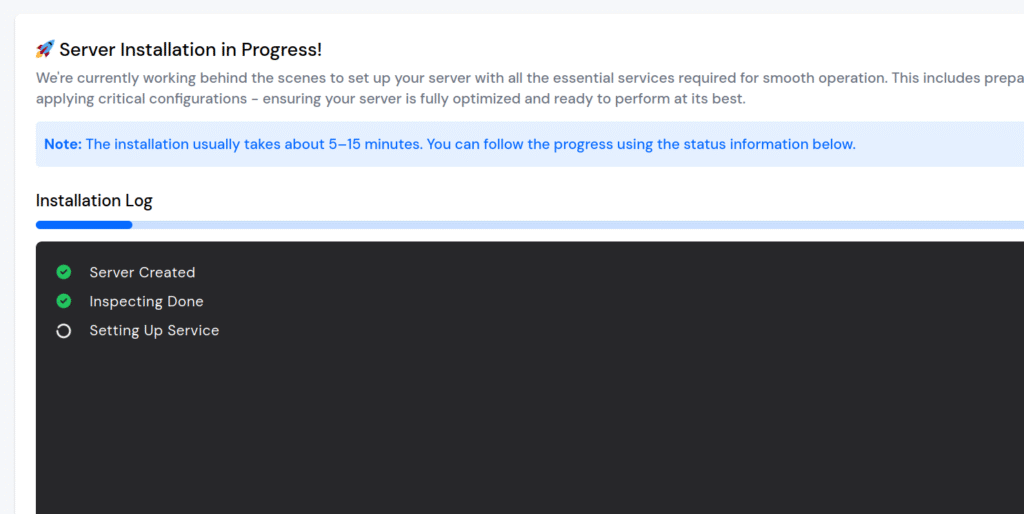
Now we just site back and relax.
Once completed you will be sitting at your admin panel.
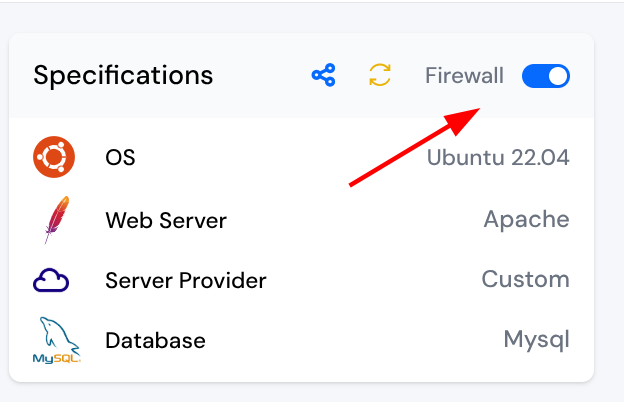
Now lets turn on the firewall. In the upper right core is the firewall toggle, toggle this on.
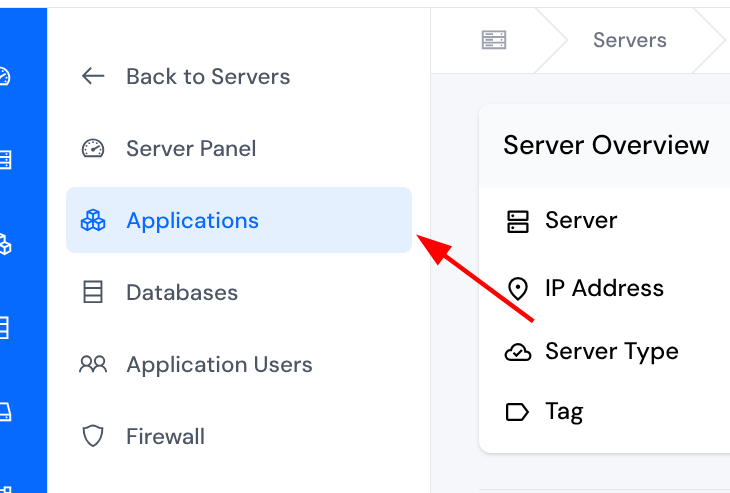
We now need to create our first website or Applilcations as they call it. On the left side of the panel click on the Application button.
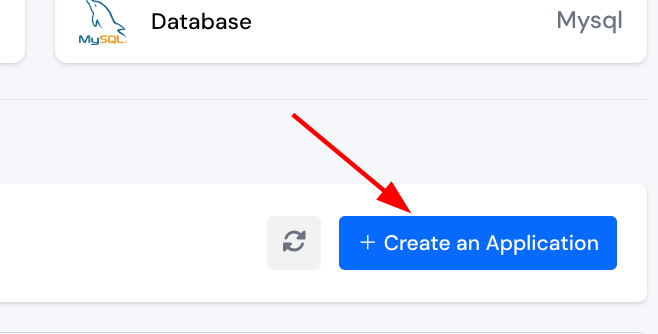
Now once the page loads, on the right site is the Create Application button click on it.
Next we have all the following fields we need to fill in.
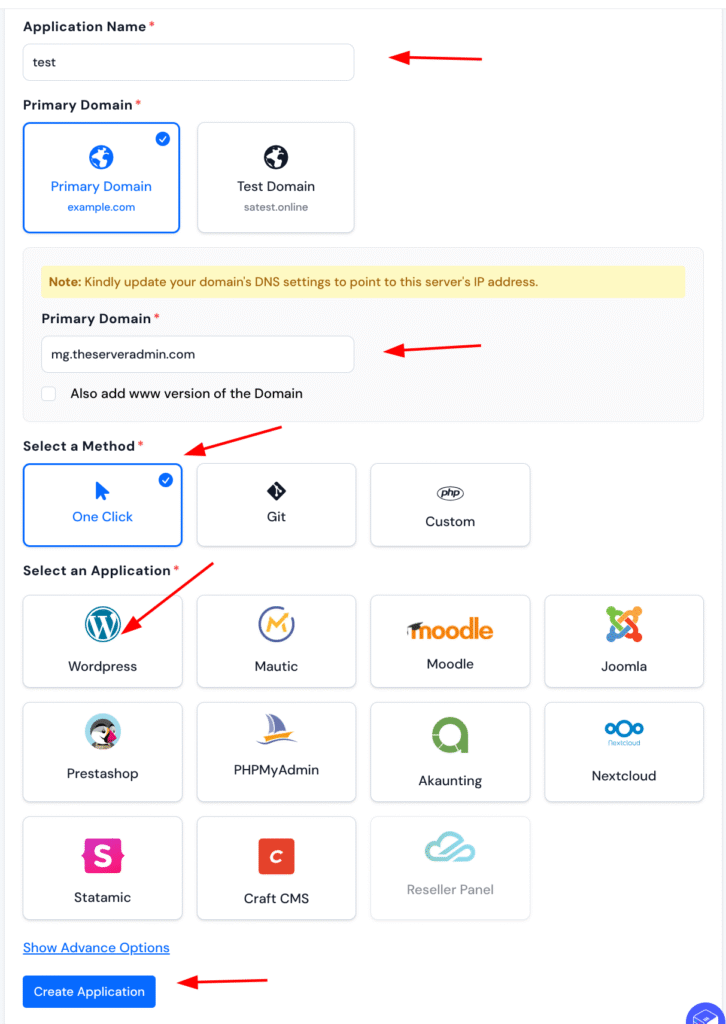
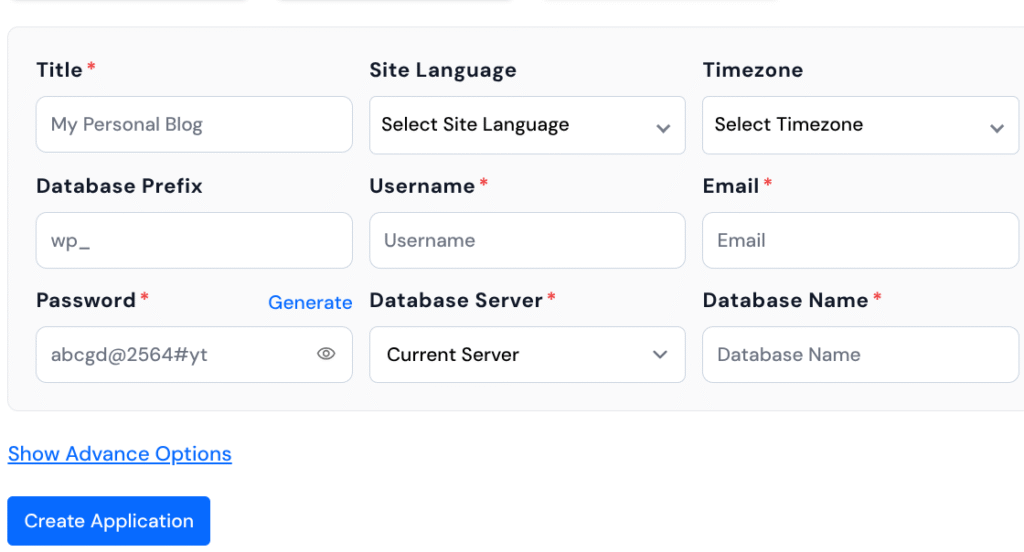
When you click on WordPress, it will expand and the following fields will appear.
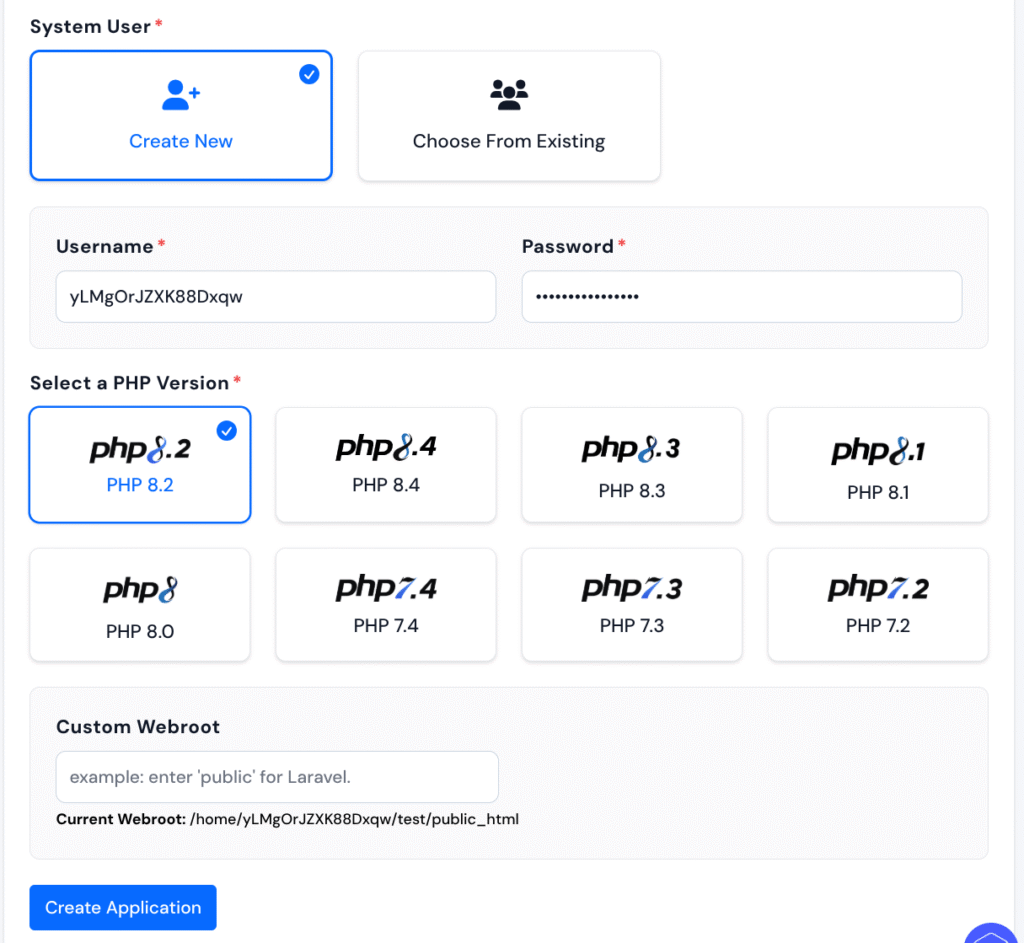
Now that your new Application has been setup you will be placed into a new screen.
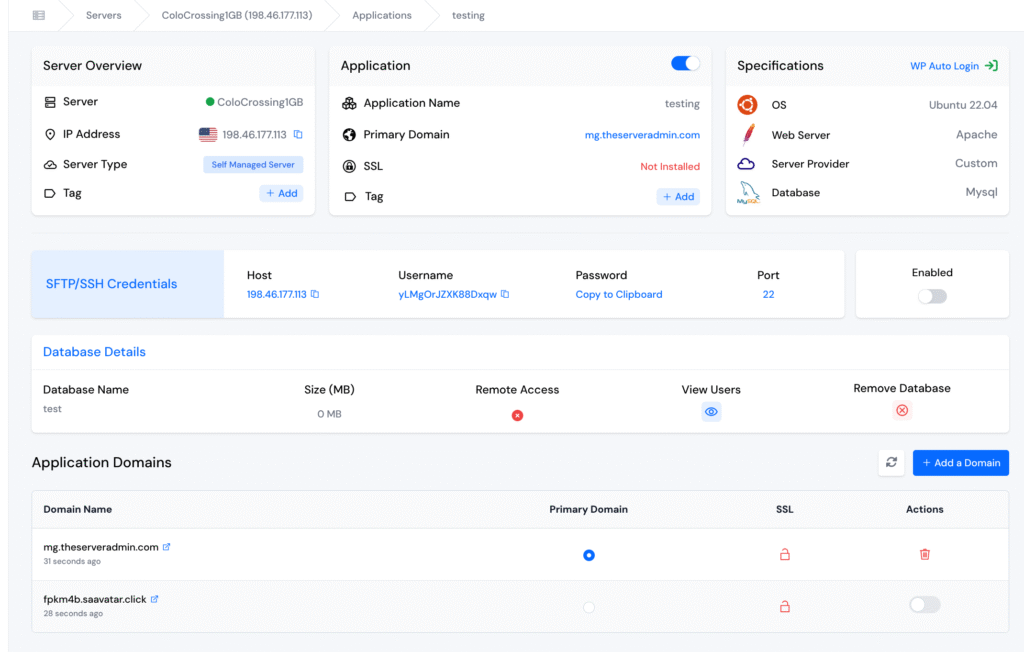
Now we need to get our SSL installed, so on the far left of the panel you will see SSL click on it.
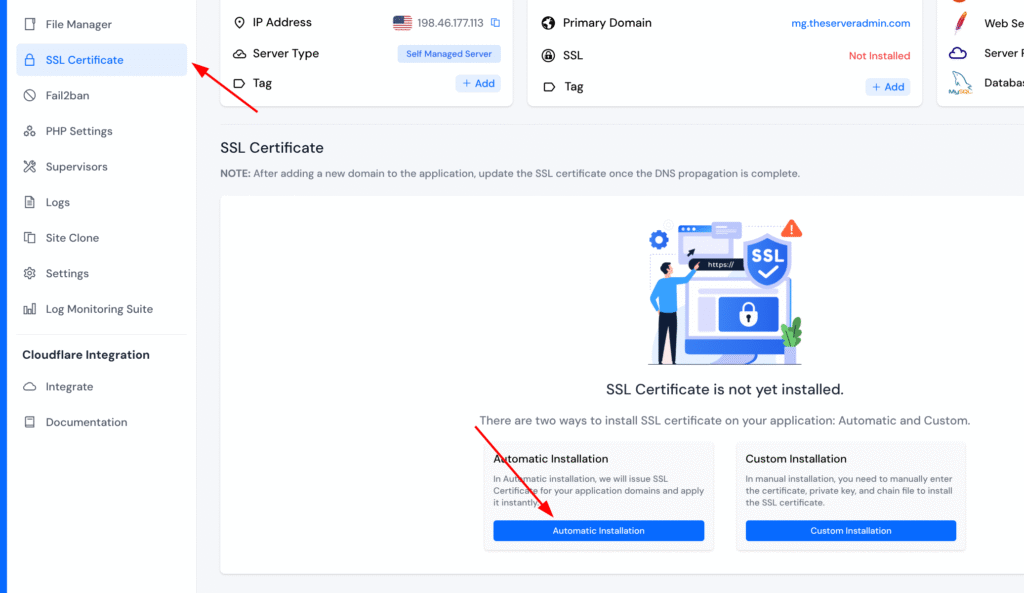
Now lets create this, first make sure your domain is pointing to your newly create VSP. You will need to see that green dot, once the dot is green click on Install Automatic SSL
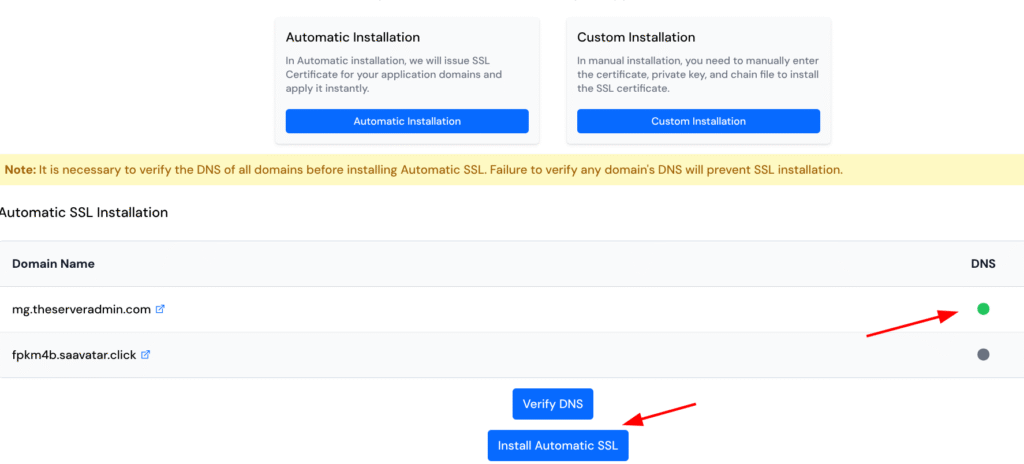
Once finished, and this process will take between 15-30 seconds. Your ssl is now installed.
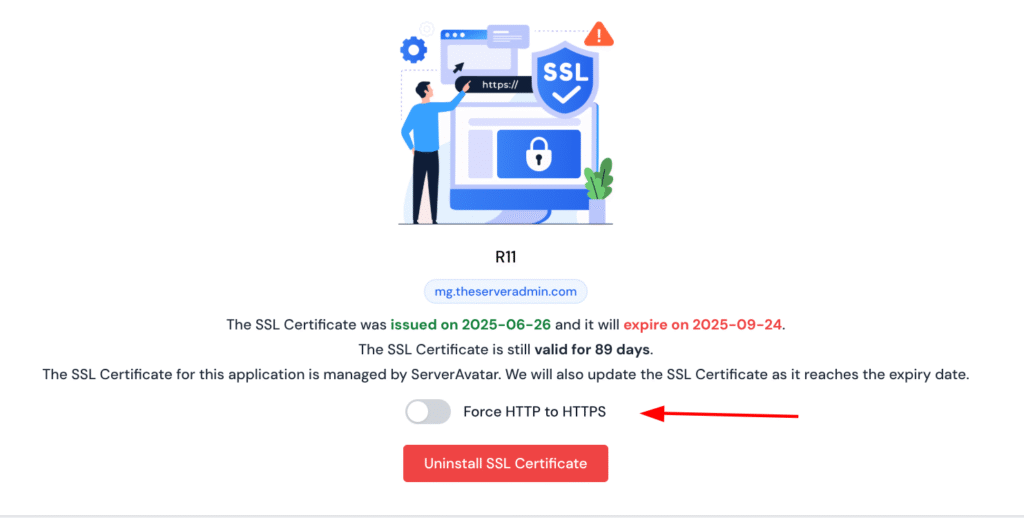
Now many people won’t even shop/look at your website if there is an SSL error or even no SSL, so lets click that Force HTTP to HTTPS.
That is it! You now have a fully setup Web Application. As we setup WordPress, there is no longer a need to upload your site, just login and restore your site from your backup.
Now as you know I have to benchmark this new site now. ** several notes.
1. I changed the default to a heavier page with woocommerce and caching. Below is my results.
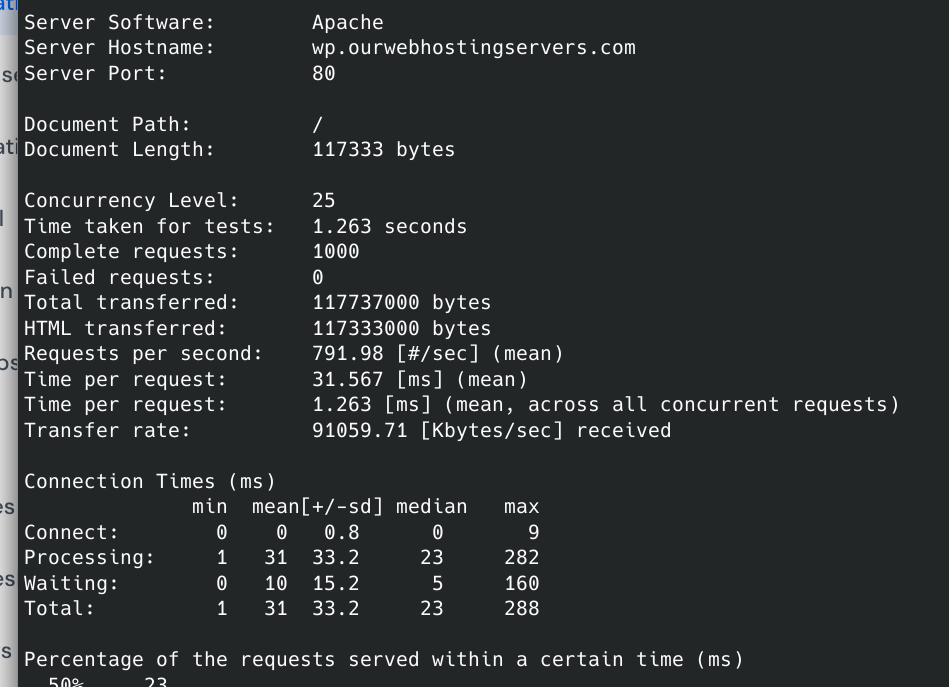
As you can see this little VPS pushed out 791 reqs/second! Holy cow!
Now what does pagespeed say?

Now let us talk numbers here. If your truly pushing more then 100 reqs/second you will crush the little VPS, however this can be a great starting point of your site for not a lot of money.
Expense Report:
Domain Name: – Namecheap $10/year
VPS: – Colo Crossing $10/year
Email: – Namecrane.com $10/year
DNS: – Cloudflare.com Free