With the ever growing need for high speed, always on computers weather it be for online trading or a central location for your file; or evening running a Windows Server for IIS or other Windows Server needs. So lets get started!
First things first a huge shout out to bin456789 over on github for this amazing script. The howto is huge, and detailed, so I am not going to go over everything. Read the manual here.
What does this script do? Well it will take your linux vps and with some really cool magic involving formatting it deleting all your data and turning it into a Windows vps. Now why would you want to do this? Well 90% of vps providers only provide linux vps’s and or the Windows vps’s just cost a fortune to have due to licensing. This post is not about stealing Windows, but using this as an example on how to convert your vps to a Windows Server for testing.
Please note the following items.
- This will format your vps causing you to loose all your data.
- The Windows 10, 11, Server 2019, 2022, and 2025 will all work but with no keys, so in evaluation mode only.
- Remote access such as vnc via your control panel is almost a must, while not needed it’s nice to have to watch the process as this can take 15-30 minutes depending on your network speed, cpu, and memory.
So lets get started, we are going to focus on a vps or a local home lab vps. The instructions and steps are the same for both, the only difference is on the vps you will need to use your vps providers remote viewer to do this. We will focus on the local vm for this.
This script only takes five commands and then you just sit back and watch the magic happen!
As virtually all vps providers provide linux as their main os, and Windows as a paid license upgrade, so the default install is linux. With that, we are going to assume you have a vm setup already with some kind of linux os on it already. If now lets get one going. But wait, “Anthony why would I not just install Windows 10/11 the “normal” way as I usually do?” Well the reason for this, is the amazing script is designed to run on 2GB’s of ram, and a vps, which usually don’t have the means to mount the iso. So this way is so much easier.
So with this, fire up that test vps, or create a new one.
Specs for this demo, to which we are going to install Windows 10.
- At least one CPU core.
- 2GB’s RAM
- 40GB Disk Space
Yes the above specs will run Windows 10 no problems, but if your home lab has more power by all means give it more resources, but you don’t need it 🙂
Now this is the part where I am referencing the vps. When you get the vps it will have linux on it so you will be ready to format/install, but at home you might not have a template. If this is the case go ahead and install Debian 1* base install. ** When you install this in your home lab make sure to check that SSH server option, as the command is very long and typing it will be a nightmare.
Now lets have all the fun!!
First command.
curl -O https://raw.githubusercontent.com/bin456789/reinstall/main/reinstall.sh || wget -O reinstall.sh $_Second command.
bash reinstall.sh windows --image-name 'Windows 10 Home' --iso 'http://microsoft.windowsmirrors.net/Windows%2010/Win10_22H2_English_x64v1.iso'Now the script is going to run for a minute or two depending on your internet speed.
After a few minutes it will finish and ask you to reboot.
rebootThat is it! Now just sit back and watch the magic happen! Depending on your internet speed, and the resources you allocated to this virtual machine/vps, this process can take 15 – 30 minutes.
Once completed you will have a killer setup with a ram usage around 1.6GB’s which mean you can install this on a >$10 a month vps!


There you go! You know have a local vm that is running Windows 10 with less then 2GB’s of ram usage. Oh yeah, look at the less then 20GB’s of disk space usage as well.
The above was for Windows 10, if you want to setup Windows 11, run the same commands, but change to
bash reinstall.sh windows --image-name 'Windows 11 Home' --iso 'http://microsoft.windowsmirrors.net/Windows%2011/Win11_24H2_English_x64.iso'Happy Testing!!
Oh yeah, this same script can install Windows Servers too!
Example: Windows Server 2025
- Windows Server 2025 Standard Core – SERVERSTANDARECORE
- Windows Server 2025 Standard – SERVERSTANDARD
- Windows Server 2025 Data Center Core – SERVERDATACENTERCORE
- Windows Server 2025 Data Center – SERVERDATACENTER
So the code would be the same, but changing the url and os name.
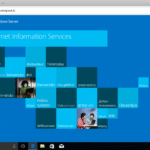
bash reinstall.sh windows --image-name 'Windows Server 2025 SERVERSTANDARD' --iso 'http://microsoft.windowsmirrors.net/Server%202025/26100.1742.240906-0331.ge_release_svc_refresh_SERVER_EVAL_x64FRE_en-us.iso'And the same 15 – 30 minutes later BOOM Windows Server 2025 is installed and running.
Now with Windows server, there are three more times you have to interact, and that is click the enter key three times to confirm the user/pass.

Happy testing!!