
Install Docker
Looking at Docker over the past year or so I decided to install Docker and play with it. However I had troubles finding a simple and correct way to install docker in Linux. So I really dug into this over the weekend and see if I can do this. After some time, a few videos, and testing I found what I needed to install Docker. Spin up a Ubuntu 22 at lease vps and lets head to the races.
I am to assume that if you have used Linux a few times, and can poke your way around the command line. With this lets fire up a testing vm or buy a vps. Now as far as specs, Ubuntu+Docker it is recommended at least 2GB’s of ram, so please make sure your vm/vps has that one requirement. Lets get started.
We only have a few commands to run now and all will be working. First things we need to do is login to our vps, setup a firewall, then install Docker.
So first thing we need to do is update our root password if you did a vps rebuild as the password is created for you and sent over clear txt.
passwd rootNow we need to setup that firewall. ** Big note here, we are going to currently just open port 22 for SSH, you will have to manually add open ports to match your Docker containers.
ufw allow 22
ufw enable
Now lets update and upgrade to get the most current packages.
apt-get update && apt-get upgrade -yFor me, I will reboot the vps so that all the packages get reload.
rebootOnce your vps comes back online, we can now install Docker.
First things, lets add our system certificates.
apt install ca-certificates curl gnupg lsb-release -yNow we have three commands to run that will pull the gpg keys to setup the new sources.
mkdir -p /etc/apt/keyrings

curl -fsSL https://download.docker.com/linux/ubuntu/gpg | sudo gpg --dearmor -o /etc/apt/keyrings/docker.gpg

echo "deb [arch=$(dpkg --print-architecture) signed-by=/etc/apt/keyrings/docker.gpg] https://download.docker.com/linux/ubuntu \
$(lsb_release -cs) stable" | sudo tee /etc/apt/sources.list.d/docker.list > /dev/null
Now lets reupdate to get the Docker sources into the mix.
apt-get updateNow we can install Docker.
apt install docker-ce docker-ce-cli containerd.io docker-buildx-plugin docker-compose-plugin -yOnce that is done were going double check what version of Docker was installed.
docker compose versionOutput at the time of writing this.
root@docker:~# docker compose version
Docker Compose version v2.40.3
root@docker:~#
As you can see, we are running version 2.40.3
Now we need to allow our Docker user access.
usermod -aG docker $USERLast thing we do is reboot. This will auto start Docker and any/all containers.
rebootThat is it, Docker is now installed and working. So lets now test thing. Currently WordPress is one of the biggest cms in the world right now, so we are going to use this as the example. Lets create our first docker compose file, as this will start the process.
First thing we need to do is create our yml file. Big note, the spacing is required as is, if you decide to modify this file just make sure you follow the examples. Also don’t forget to punch a hole in your firewall to allow web traffic.
ufw allow 80
ufw allow 443
ufw enable
Now lets start creating that yml file.
nano compose.ymlservices:
wordpress:
image: wordpress
restart: always
ports:
- 80:80
environment:
WORDPRESS_DB_HOST: db
WORDPRESS_DB_USER: exampleuser
WORDPRESS_DB_PASSWORD: examplepass
WORDPRESS_DB_NAME: exampledb
volumes:
- wordpress:/var/www/html
db:
image: mysql:8.0
restart: always
environment:
MYSQL_DATABASE: exampledb
MYSQL_USER: exampleuser
MYSQL_PASSWORD: examplepass
MYSQL_RANDOM_ROOT_PASSWORD: '1'
volumes:
- db:/var/lib/mysql
- php:/home/anthony/php/php.ini:/usr/local/etc/php/conf.d
volumes:
wordpress:
db:
php:Note the one item you need to change the location of the php.ini file. I changed this as I wan’t bigger uploads then the default.
nano /home/anthony/php/php.iniNow this is my php.ini file as I changed 4 attributes.
wget https://theserveradmin.com/php.txt
mv php.txt php.ini
Now let us download and build the Docker container.
docker container upYou will now see the first run where Docker will download the images, and then set them up.
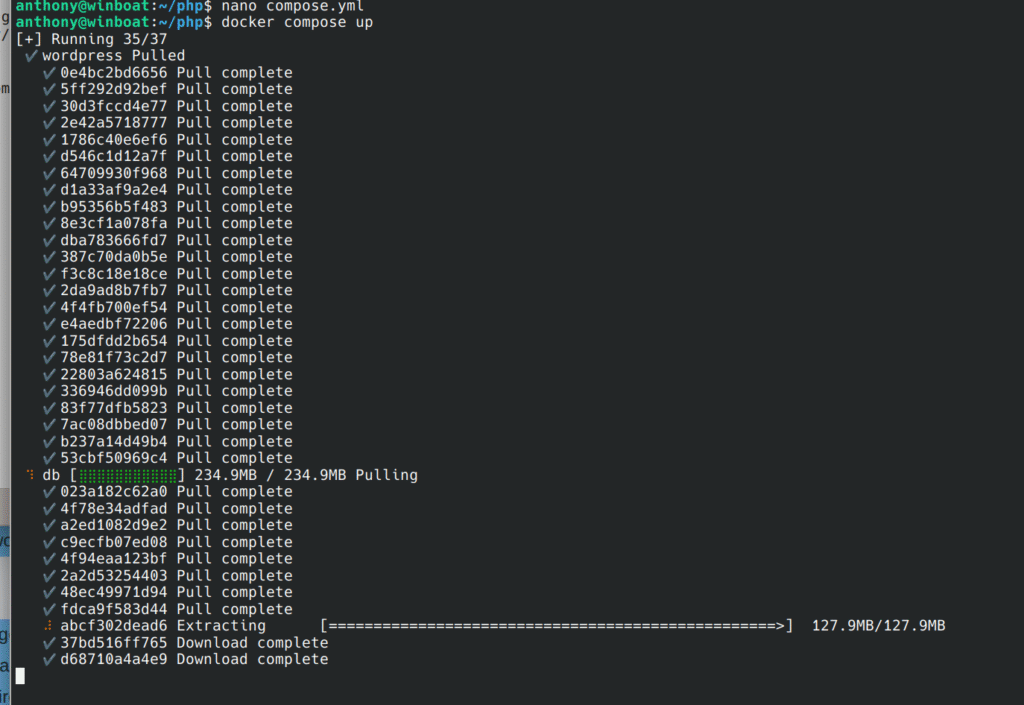
Once you see this, it will take maybe another minute or two depending on your network connection.
Here is what the output should end at.
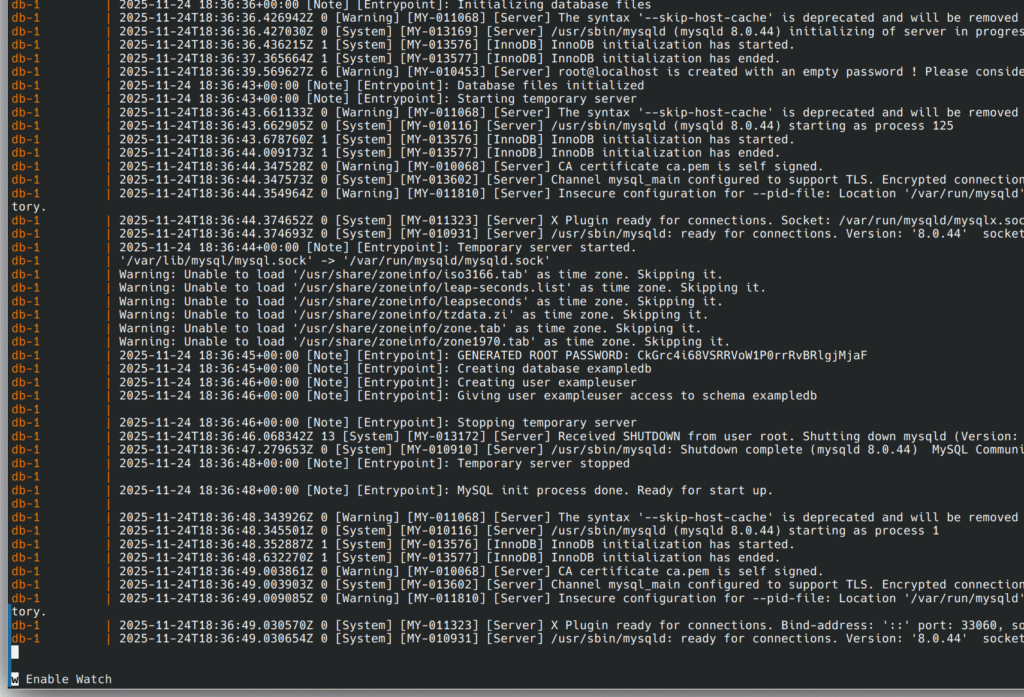
If you see this, then Docker is working. Now go ahead and click Ctrl Z to kill this process.
Once killed off, now run the following to make this run in the background.
docker compose up -d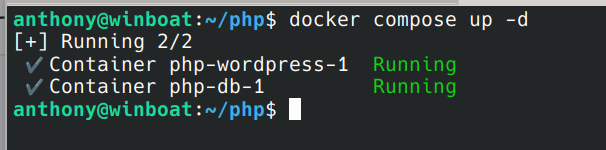
Now this isn’t going to work to the public yet, we need to open the ports.
ufw allow 80
ufw allow 443
ufw enable
Now in your browser head to your IP http://yourip and from there you will now see the WordPress installer start.
That is it! Your now running a WordPress Docker container! Check it out at http://docker.theserveradmin.com/
Let us talk about a few other commands
The command docker ps is the first command, this shows you your containers.
docker ps
Stop the container (if its running).
docker stop <Container ID or Name>Remove the container.
docker rm <Container ID or Name>There you go, a new Docker setup, and able to be played with.

